Thursday 30 September 2010

Checkerboard Cake.

I've been going to my local library to check out the cookery books. It's the best of both worlds as you get to try all sorts of different recipes and without having to buy a expensive book! My library has a decent selection to browse through and so a couple of weeks ago I brought back the "Green & Blacks Chocolate Recipes". I had a quick look through and the cake that struck me the most was the checkerboard. It is a pretty big cake, so it deserved a big occasion - my friend's 20th! 

Checkerboard Cake (adapted via "Green & Blacks Chocolate Recipes")


Ingredients:
Vanilla batter:
225g unsalted butter
225g caster sugar
4 large eggs
1 tsp vanilla extract
250g plain flour
10g baking powder

Chocolate batter:
225g unsalted butter
225g caster sugar
4 large eggs
220g plain flour
50g cocoa powder
10g baking powder

Vanilla frosting:
80g unsalted butter
250g icing sugar
1-2 tbsp of milk
1 tsp vanilla extract

Chocolate Ganache:
150g dark chocolate (minium 60% cocoa solids)
150ml whipping cream

Method:
1. Preheat the oven to 190 degrees.
2. Butter the three cake tins and line the bases with greaseproof paper.
3. Make the vanilla cake batter. Cream together the butter and sugar thoroughly. Add the eggs, one by one, mixing until well incorporated, then add vanilla extract. Sift together the flour and baking powder andt add to mixture, stirring well. Take note that this mixture will be quite stiff!
4. Make the chocolate cake batter. Same instructions as before (minus the vanilla extract of course!) and sift in the cocoa powder at the same time as the flour and baking powder. Stir. Once again, the mixture will be stiff.
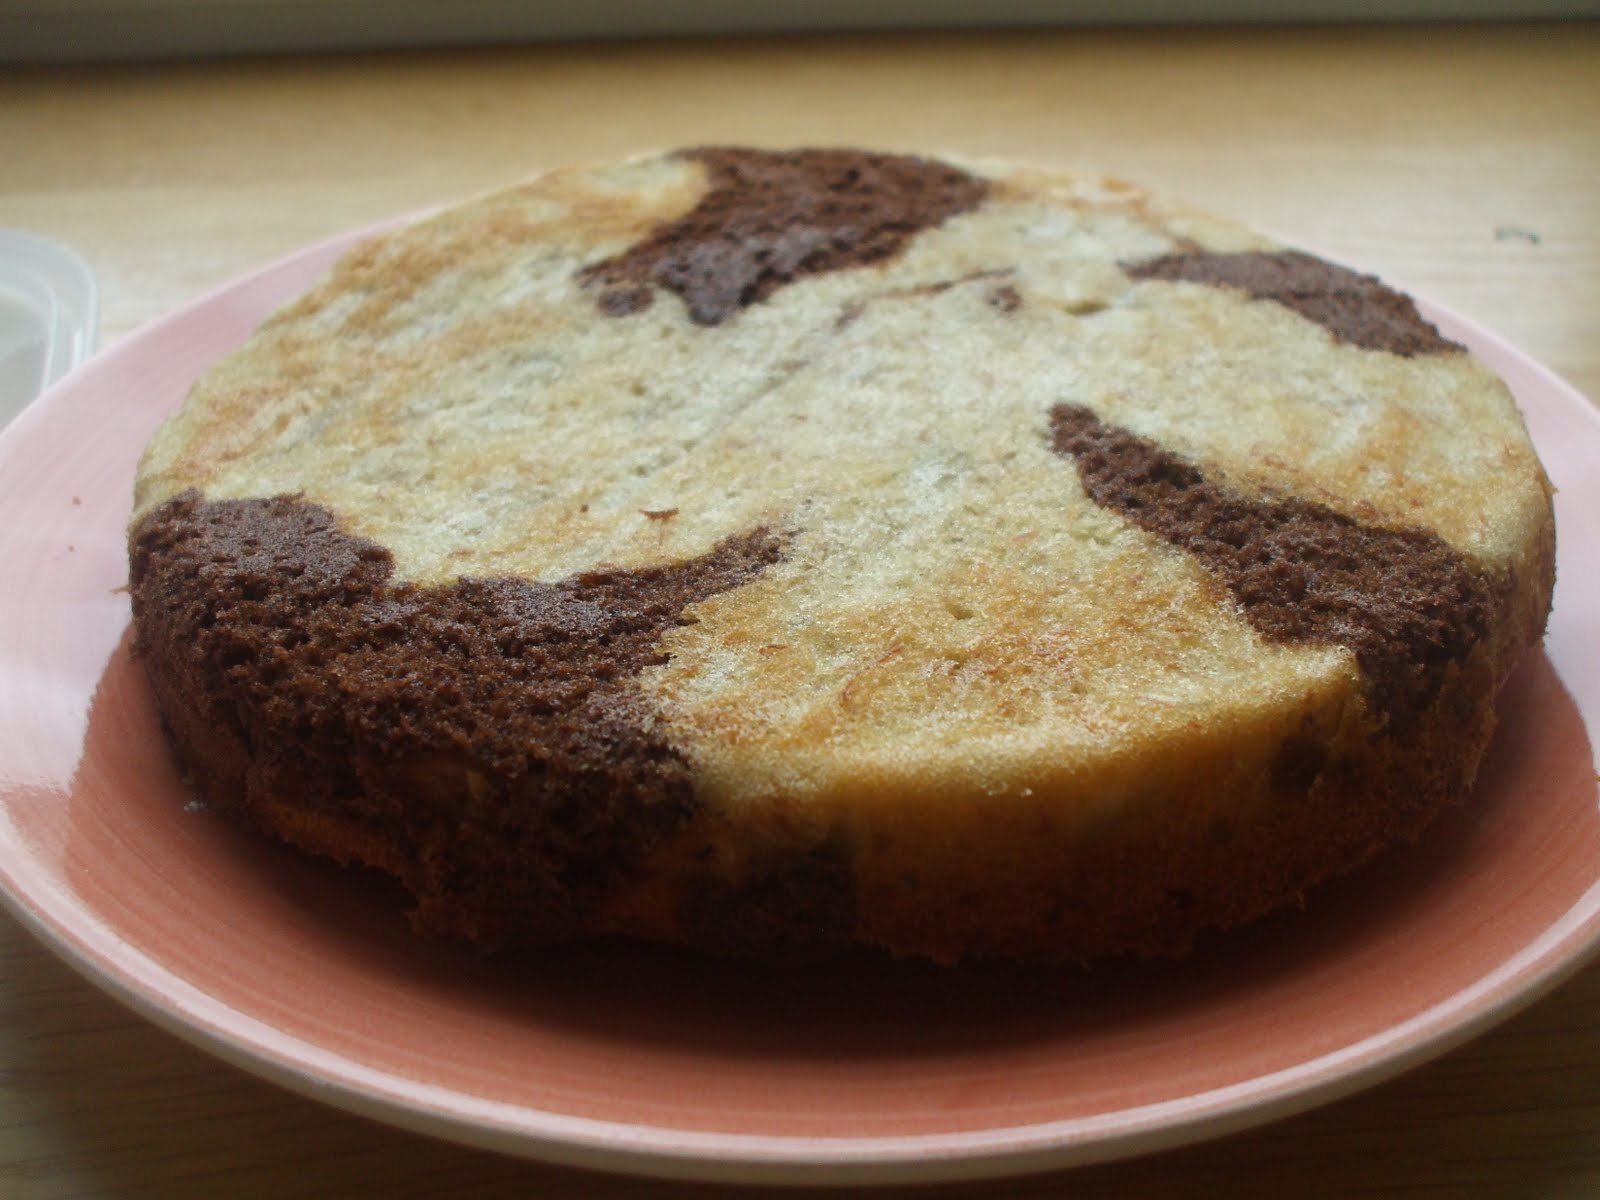
5. Time to make the rings of batter! You can either do this by placing the cake batters in different piping bags and piping a ring around, or do what I did and spoon a rough circle shape around the tins. Start by piping a ring of vanilla, then chocolate etc. On the next cake pan, start with a ring of chocolate then vanilla etc and then finally on the third cake pan repeat the pattern from the first.


I ran out of cake tins and had to make one cake in a pie dish!
 

  6. Bake in the preheated oven for around 20 minutes or until a skewer comes out clean.
7. Leave cakes in their tins to cool for around 10 minutes before transferring to a wire rack to cool completely.
 8. Prepare the vanilla frosting. Mix together the butter and icing sugar with an electric whisk. Mix together the milk and vanilla extract and add a teaspoon of the mixture at a time while whisking. Stop adding milk when mixture sticks to the back of the spoon and is light. Whisk for around 4-5 minutes.
9. Once your cakes are cool, place the first vanilla ring on the bottom and spread vanilla frosting over the top. Place the chocolate ring on top and repeat. Finally add the other vanilla ring on top.
 10. Make the ganache. Melt the chocolate in a heatproof bowl suspended over a saucepan of simmering water. Once melted set aside.
11. Whip the cream until soft peaks form, then pour the hot chocolate over the cream mixture whilst continuing to mix until the chocolate has just blended.
12. Once the ganache is cool, spread over the entire cake.

I iced mine with a birthday message. It was my first time actually writing words, so it was a bit dodgy!


 It was a surprise to find out how well the checkerboard design had worked out as, of course, I only got to see inside when the birthday boy cut the cake! I think the idea of checkerboard was there - it would have probably been better if I had piped the rings so they were consistent but still!

Wednesday 22 September 2010

Dinosaur Biscuits.

Has anyone been watching The Great British Bake Off? It finished last night and without giving anything away the person I wanted to win, won! Anyway, if you have missed it it was on BBC2 and so is on the iPlayer so I'd reccommend that you go and give it a watch!

To coincide with the television programme, a book was released that includes old favourites and some of the bakers own recipes. When I saw Miranda's vanilla biscuits in episode two I immediately wanted to make them! They looked absolutely delicious. Anyhow, I was in Tesco a good few weeks back and they selling the book for the reasonable price of £10. So after a quick flick through, I bought it and was pleased to see the biscuits were in there.


Vanilla biscuits (makes 30)

200g unsalted butter
200g sugar
1 egg (beaten)
1 vanilla pod
400g plain flour

Afraid there is no photo of the ingredients this week so you'll have to make do with imagining it. Not sure why I didn't, but there you go. Oh, and it is also worth saying that I halved this recipe when I orginally made it as I didn't think my friends would eat 30 biscuits. (How wrong I was!)

Method: 
1. Put the butter and sugar into a mixing bowl. 
2. Split the vanilla pod half along its length and scrape out the seeds, into the bowl. (I used vanilla extract and the taste was fine, so if you don't have a vanilla pod to hand extract works too!)
3. Mix together until very light and creamy.
4. Gradually add in the beaten egg into the mixture.
5. Sift in the flour and mix slowly. Then, use your hands to bring together to create a soft dough.
6. Divide the dough into half and form into a thick disc. Wrap in clingfilm and chill for 30 minutes or until firm.
7. Roll out the dough onto a floured surface to a thickness of around about 5mm. Cut out shapes using your cutters and then return to the fridge to chill for a futher 15 minutes. Preheat the oven to 180 degrees.
8. Bake the biscuits in the preheated oven for about 9-12 minutes - until they are just starting to turn golden brown and are firm to tough. Remove from oven, leave to firm up on trays for a minute, then place them onto a wire rack to cool completely.

(Recipe adapted from "The Great British Book of Baking" by Linda Collister).

You can leave these plain or ice them as I did. The best kind of icing for these biscuits is Royal Icing - icing sugar, water, and lemon juice. However, I didn't have any lemon juice so just used icing sugar and water. I made Royal Icing as more of a "See what the icing's doing" more than "I'll do measurements" but if you haven't made it before you want a stiff icing that holds it shape for the outline and then for the middle you "flood" - which means add a little more water to your icing so it floods the inside of your piping.
As you can probably see mine weren't so great but it was my first time. The piping itself was alright but the flooding I had a bit more of an issue with. Anyway, green dinosaurs!
Or perhaps blue is more their colour?

Wednesday 15 September 2010

Banana and Chocolate Marble Cake.

The last time I made Marble Cake it turned out to be pretty dry. Was it my recipe, my oven or just cooked too long, who knows? We still ate it, but with some custard so it wasn't a complete disaster!

My friend requested a Marble Cake for movie night so I knew I had to adapt the recipe to make sure that it was moist. And what cake is always moist? Banana bread of course! So, a Banana and Chocolate Marble Cake it was.
 
  
Banana and Chocolate Marble Cake (serves 8)
 125g butter
125g caster sugar
125g self-raising flour
2 medium eggs
2 slightly mushy bananas
5-10g of cocoa powder
 

1. Cream butter and sugar together.
2. Add one egg and about half the flour, stirring until fully incorporated. Repeat with the other egg and remaining flour.
3. Peel and break the bananas into rough pieces. Place in bowl and then mash with a fork until more of a liquid consitency.
4. Place around a third of the cake mixture into a seperate bowl and add the cocoa powder. Mix until combined.
5. Add the bananas to the plain cake mixture and combine.
6. Grease and flour two 20cm cake tins.
7. Dollop alternative spoonfuls of the banana and chocolate cake mixture between the pans and then, using the handle of a spoon or a skewer, swirl around to create the marble effect.
8. Place in a preheated oven of around 180 degrees celsius for around 25-30 minutes. Remove when either the sponge bounces when pressed or when a skewer comes out clean.

You could always do this in a loaf tin but I wanted to make to cake with filling and all. I used my usual vanilla frosting recipe from Hummingbird to sandwich this together as it isn't too sickly and again, just adds some moisture.

Wondering what happened to the dinosaur biscuits I said I'd make a couple of weeks back? Here's a sneak preview!

Check back next week for the full post!

Thursday 9 September 2010

Monkey Bread!

September's TSR recipe was chosen by Procrastibaking and was Monkey Bread, the recipe can be found here with lots of photos. I was parted from my camera for the weekend so I'm afraid I only have photos of the finished product taken off my phone camera - so not the best quality!


It was my first time making any kind of bread and so I was a little unsure of how the dough was actually meant to be. It also gave me an excuse to use my bread hook with my new stand mixer that I'd received for my birthday which I believe did a lot of the work! So, with that I left my dough in an oiled bowl for an hour to rise and goodness did it rise!

For my first time with bread I was pretty pleased so I'm sure I'll try again in the future with just a plain loaf and see how that goes!

Monkey Bread
Dough:
4 tablespoons unsalted butter, divided, 2 tablespoons softened and 2 tablespoons melted
1 cup milk, warm (about 110 degrees F)
1/3 cup water, warm (about 110 degrees F)
¼ cup granulated sugar
1 package instant yeast
3¼ cups plain, plus extra for work surface
2 teaspoons salt

 Brown Sugar Coating:
1 cup light brown sugar
2 teaspoons ground cinnamon
8 tablespoons unsalted butter (1 stick), melted
 Glaze:
1 cup icing sugar
2 tablespoons milk
 Adapted from Brown Eyed Baker. Method can be found here.

Monday 6 September 2010

Chocolate Kisses

Sorry for my absence! My laptop charger dramatically died before the weekend so I had to make do with an hour of battery but I am now the owner of a new charger so back to blogging!

This recipe comes from the book "Eat Me!" by Xanthe Milton which I receieved for my birthday. It's a lovely book and I decided to make the recipe for Chocolate Kisses, one because they seemed relatively easy and two, because they could be taken to a friends to eat as I would be away for a good few days.

Chocolate Kisses Ingredients (makes 24)
170g plain chocolate
110g unsalted butter, at room temperature
110g caster sugar
2 eggs
255g plain flour
icing sugar, for dusting
Let's just take a second to appreciate my new storage jars, hm?
1. Preheat oven to 190 degrees. Grease two baking sheets with
butter.
2. Melt the plain chocolate (either in the mircowave or in a bowl over simmering water) Stir the chocolate until it is melted. Leave to cool.

3. Cream together the butter and sugar until pale and fluffy, then add the eggs one by one. Sift the flour over this mixture and mix together.

4. Add this mixture to the chocolate and mix thoroughly until the chocolate dough is fully blended. Knead with your knuckles so that the dough is smooth, then wrap in clingilm and chill for about an hour.

5. Remove the dough from the fridge and roll reaspoon-sized balls between your palms. Place the balls on the baking sheets and bake for 10-12 minutes. Dust with icing sugar and leave on a wire rack to cool.

Adapted from "Eat Me!" by Xanthe Milton.


These tasted very chocolatey and were tasty but I wasn't sure if they were a biscuit or some sort of cake. I suppose they were meant to be biscuits as they were baked on a tray rather than in cases but still, the texture wasn't that of most biscuits. One of my friends described it as being like a chocolate scone! Perhaps I'll need to try them again another time to see if the texture is any different.


What do you think - cake or biscuit?